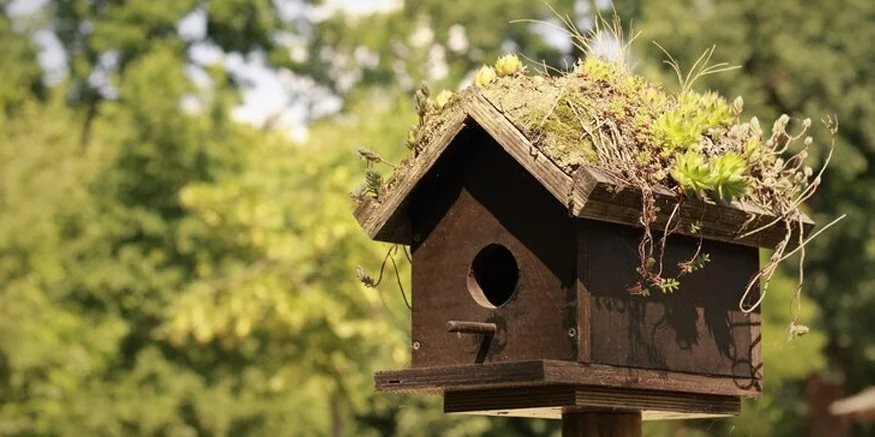
Initiating a do-it-yourself birdhouse project is a fantastic way to enjoy a pleasant activity and strengthen your relationship with nature. With a focus on children, we aim to help you know how to build a birdhouse and make birdhouse building fun and family-friendly. As we explore the world of creativity and craftsmanship with different birdhouse ideas, we can work together to turn a simple tutorial into an incredible experience that will captivate both children and adults.
- Materials You’ll Need:
- A wooden birdhouse kit or individual pieces (available at craft stores)
- Wood glue
- Sandpaper
- Acrylic paint and brushes
- Outdoor varnish or sealant
- String or wire for hanging
- Why Build a Birdhouse?
- Connection with Nature: Building and installing a birdhouse allows kids to observe and connect with nature. They can witness different bird species making your creation their home.
- Academic Possibility: This build-a-birdhouse project is a great educational opportunity. Youngsters can gain knowledge about many bird species, their nesting behaviours, and the value of offering refuge.
- Creativity Unleashed: Build a birdhouse project serves as a creative outlet. From the planning to the painting stages, children are free to express themselves artistically.
- Practical Training: This practical exercise develops patience, attention to detail, and fine motor abilities. It’s a useful approach to get kids involved in woodworking in a fun and safe way.
- Benefits of Personalised Birdhouses
- Encourages Imagination: Personalising birdhouses sparks creativity and allows kids to unleash their imagination. It’s a fantastic way for them to express themselves through art and design.
- Demands Accountability: Children learn responsibility by maintaining a personalised birdhouse. They find out how important it is to provide a secure habitat for wildlife as they take on the role of guardians of a miniature environment.
- Educational Value: Building themed birdhouses offers the chance to educate people about certain bird species, their natural habitats, and distinctive traits. It turns into an interactive lesson on nature and biodiversity.
- Encourages Outdoor Activities: Every step of the process, from planning to watching bird behaviour, promotes outdoor interaction. Kids can stay active and maintain a connection to the natural world with this hands-on craft.
- Step 1: Select the Style of Your Birdhouse
- Step 2: Sanding for Smoothness
- Step 3: Assembly
- Step 4: Personalise with Paint
- Step 5: Seal the Deal
- Step 6: Adding Final Touches
- Adding More Creativity: Personalised Touches for Your DIY Birdhouse:
- Step 7: Create a Welcoming Entrance
- Step 8: Interior Decor
- Step 9: Theme-Based Birdhouses
- Step 10: Install a Perch or Landing Pad
- Step 11: Personalised Birdhouse Nameplate
- Step 12: Observation Window
- Step 13: Themed Surroundings
Gather the following materials to get started:
Also Read: Animals and Their Homes
Look for a wooden birdhouse kit with pre-cut pieces online or at a craft store. Alternatively, you can gather individual wooden pieces to create your design. Let your creativity flow – think about the size, shape, colour and other birdhouse ideas of your birdhouse.
Before assembling, use sandpaper to smooth out any rough edges or surfaces. This step ensures a safe and comfortable home for the birds and makes it easier to paint later.
Follow the instructions provided with your kit or arrange the individual pieces according to your design. After securing each component with wood glue, let it dry fully. Children have a tremendous opportunity to learn patience with this.
Also Read: Fun Bird Activities for Children
It’s time to add vivid colours to your birdhouse to make it come to life once the glue has dried. As you paint the exterior, let your creativity run wild. Consider adding patterns, shapes, or even replicating your favourite bird species.
Use an outdoor varnish or sealer to shield your artwork from the weather. This guarantees that your birdhouse will remain colourful and hospitable in all kinds of weather.
Attach a string or wire to the top of the birdhouse for easy hanging. Find the perfect spot – a tree branch or garden hook – and let your birdhouse find its new home.
Building a DIY birdhouse is a fascinating do-it-yourself hobby with unlimited possibilities. As you embark on your voyage with your kids, consider adding touches to make your birdhouse truly one-of-a-kind. To make your birdhouse-building experience even better, follow these extra steps:
Choose or create an entrance that suits the type of birds you hope to attract. Different bird species prefer specific entrance hole sizes. Research local birds and tailor your birdhouse accordingly. It’s like customising a home for your avian neighbours.
Why stop at the exterior? Think about the inside of the birdhouse. You can add a cosy touch by placing soft materials like moss or feathers. Not only does this provide comfort for the birds, but it also allows kids to learn about the nesting habits of different species.
Also Read: World Sparrow Day
Develop your artistic abilities by creating birdhouses with a theme. A spaceship, a little castle, or a house straight out of a fairy tale are all possible choices. By letting them choose a topic that interests them, you can let your kids turn your birdhouse into a little artwork.
Birds appreciate a landing spot before entering their homes. To facilitate the comings and goings of our feathery friends, place a tiny perch or landing pad next to the entryway. This offers an aesthetically beautiful feature in addition to its practical use.
Create a small nameplate for your birdhouse. It could be as easy as painting the family’s name or giving the birdhouse a catchy moniker. Giving the birdhouse a special name makes it more individualised and gives you a sense of pride.
Consider adding a small observation window to your birdhouse. This can be a tiny clear panel that allows kids to peek inside without disturbing the birds. It’s an excellent way for children to witness the nesting process and observe the growing bird family.
Enhance the overall aesthetic by creating a themed environment around the birdhouse. Add small accessories like miniature garden furniture, and tiny signs, or even create a mini garden around the base. This transforms the birdhouse into a focal point in your outdoor space.
With these special finishing touches, your DIY birdhouse becomes more than just a home to keep birds safe—it becomes a display for your family’s artistic sensibility and enjoyment of the natural world. Remember that the journey is just as important as the destination while starting this unique birdhouse project. So gather your materials, unleash your creativity, and relish the fun of crafting a masterpiece that is suitable for birds. Come build with us at EuroSchool, not just birdhouses but also enduring memories of creative inquiry.